Infill Landscape Blog
The Ultimate Checklist for Turf Infill Installation
Consult this handy reference for installing a flawless turf field, yard, or park!
Congratulations on choosing a turf infill solution for your field, yard, or park! At this point, you already understand the benefits of our innovative approach to changing the landscape of artificial turf.
Now that it’s almost time to revamp your field, yard, or park with our safe, natural and sustainable turf infill, make sure to have all of the necessary tools and compatible products. A little preparation makes for an easy and seamless project. Before you know it, you’ll be making memories and playing in the sunshine!
What tools will I need to install turf infill?
Great question, and an appropriate place to start! Round up these essential tools for the job:
- Utility knife, for easily opening bags of turf infill
- Duct tape, for sealing partially used bags of Envirofill or Safeshell
- Gloves (optional)
- Safety goggles
- Wheelbarrow
- Forklift, depending on the size of your project, consider using a forklift for unloading pallets or super sacks of turf infill
- Drop spreader
- Large scoop shovels can be used for small applications
- A 36” wide drop spreader is best for applications of 1,000-5,000sqft
- A power or pull behind drop spreader is best for applications over 5,000sqft
- Power Broom or Grandi Groom
- Use a 24” nylon handheld power brush for applications of 1,000-5,000sqft
- Use a BCS power walk behind for applications of over 5,000sqft
- Use a lawn rake or Grandi Groom for very small applications
- Wire brush, for detailing edges and corners of your turf field, yard, or park
- Broom and/or leaf blower, for cleaning excess infill around the perimeter of the project site
- Lawn roller, for putting green, tennis and bocce applications
- Use a 24-36” water roller for applications up to 1,000sqft
- Use a 36-48” Walk behind power turf roller recommended for applications over 1,000sqft
How do I prepare the project site?
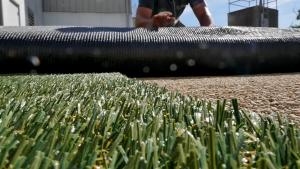
Before installing your turf system, you must first prepare the grounds. Remove the existing surface (natural or otherwise), relocate irrigation systems, and rewire electrical systems.
Next, create the base of your project site. The base is important for drainage and stability. It’s typically made from a mix of crushed stone, sand and/or other aggregates. The depth will vary depending on your area’s weather patterns and use of the area. Many bases require 3 inches of this imported material. Once the base is leveled and tightly packed, your project site is ready for turf installation!
What components and materials are needed for my turf system?
Once you have the right tools and have adequately prepared the project site, you will need to understand and source the specified components of your turf field or landscape project. Let’s dissect and identify the turf system, layer by layer.
1. Safety Pads
Typically installed in playgrounds underneath artificial turf, safety pads create a low impact surface that’s perfect for playground shenanigans. They aren’t required for all turf applications but are beneficial to areas designed for children.
2. Turf Type (Artificial Grass Product)
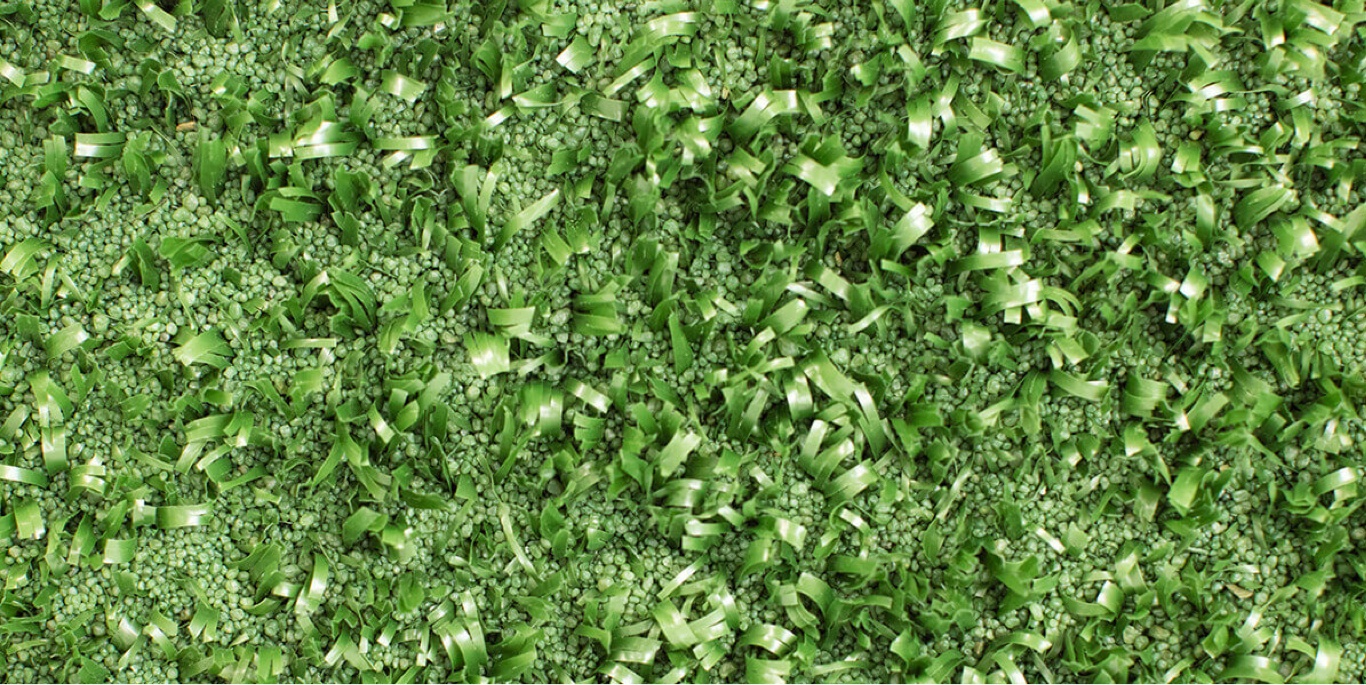
There are numerous artificial grass products on the market, which can make it difficult to decide which is best for you. Start with how you will be using the space, i.e. for a children’s play area, dogs, recreational space or maybe just casual leisure. Usage will dictate the length of the blades needed. For example, short blades tend to wear better under high traffic. It will also determine the color and thatch layer, which helps to support the grass blades in addition to gives your lawn a more natural appearance. It is installed between the primary blades. Multi-purpose products tend to be 1.5”-2” tall with a multi-color thatch layer.
3. Turf Infill
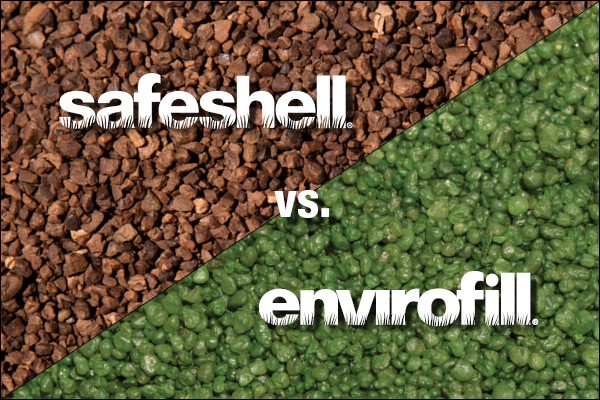
Ready to bust open those bags of innovative, top-quality turf infill? This is the last component of your turf system. We consider it the most important component because it impacts the look, function, feel, longevity and cleanliness of your lawn or field. Envirofill is green, so it blends well with the turf.
Infused with the power of Microban technology, our turf infill fights against bacteria, mold, mildew, and pet odors! The infill also helps mitigate wrinkling in the turf, protects the primary turf backing from UV degradation, supports the grass blades, and helps prevent premature turf matting and wear.
What is the process for successfully installing turf infill?
The procedures below assume that all ground preparation, sub-base, borders, and synthetic turf materials have been completed and the surface is ready for infill.
1. Prepare all tools and equipment and ensure all safety precautions are met.
2. Just before applying the Envirofill, rake or power broom across the surface of the synthetic turf so that the blades of grass are as vertical as possible. This will help “open” the surface so that the granules have easier entry in between the fibers. The goal is to fill the section from bottom up.
3. Cut open the Envirofill bag and fill the spreader hopper to a comfortable weight limit.
4. Start along one end of the lawn and move sideways in parallel rows.
5. Calibrate the spreader based on the application rates above for the respective application type (pet, golf, etc). We recommend spreading and raking the product into the fibers in lifts (1/4” at a time) to ensure proper distribution and quantity.
6. Once you have made the first pass over the entire surface, power broom the Envirofill deeper into the surface, making sure that there are no granules sitting on top of the grass blades.
7. Begin your second pass once you’ve power-broomed the entire surface. Repeat this process until you have reached the recommended depth stated above for each application type.
8. Once completed, the grass blades should appear vertical (maybe a slight angle) and consistent across the surface. If some areas appear flat or matted, more Envirofill may be needed.
9. When using a thatched turf product, the Envirofill should not be noticeable at a glance. The top of the Envirofill should be buried under the thatch yarn slightly and only recognized when kneeling and spreading the grass bladed apart with your fingers.
10. Finally, use an infill measuring device to confirm proper recommended depth.
*Note: Slit film putting greens will need to be rolled in order to bend the blades of grass over the infill. Client and contractor should consult each other to achieve the desired stimp speed. Generally, the Envirofill should be top dressed to within 1/8-1/4” from the tips of the grass before the green is rolled.
Specific guidelines for installing the first layer of your turf system vary and depend on the design and intended usage of your turf system.
- Residential lawns and yard landscaping require medium to longer pile heights (1 5⁄8” –2 1⁄4”) and include a primary monofilament blade with a shorter, texturized yarn in between (referred to as thatch). This layer should be dense to replicate a natural seeded or sod lawn. We recommend a ratio of 3/8”-1/2” of Envirofill for every 1” of pile height for the turf type described above. This equates to approx. 2-3.5lbs of Envirofill per square foot for every 1” of pile height. Recommended mesh size for these applications would be 12-20 or 16-30.
- Playgrounds typically require a short to medium pile (1 1⁄4” – 1 3⁄4”). Similar to residential products, they often include a thatch layer to provide more density and better wear over time. We recommend the 12-20 or 16-30 Envirofill with this application at a rate of approx. 3/8”-1/2” for every 1” of pile height or approx. 2-2.5lbs of Envirofill per square foot. It should be noted that if a safety pad is used under the turf, this does not change the Envirofill recommendations.
- Dog-friendly applications typically use a shorter pile (1”-1 1⁄2”) and may or may not include the thatch layer. Some products used for these applications will be a texturized PE or PP (Polyethylene or Polypropylene). For any non-texturized product (3/8”-5/8”), we recommend using Envirofill 12/20 or 16-30 mesh at the rates applied above. Tightly knitted, short texturized products may require a smaller mesh for easier installation which would be the 16/30 or 30/50 Envirofill products. We would recommend 2-2.5lbs per square foot for these systems.
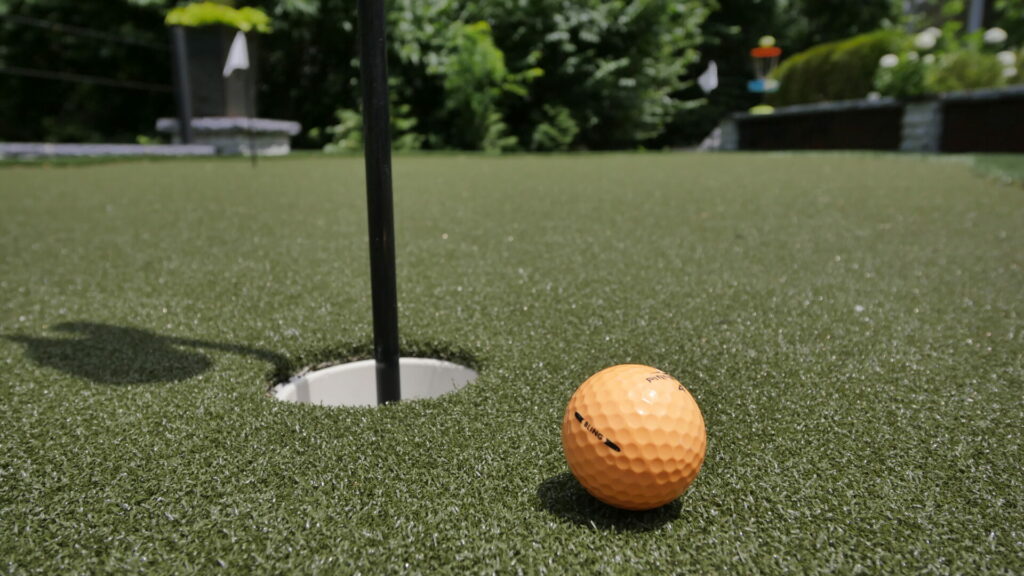
- Putting Greens, tennis courts, and bocce courts have two common types of synthetic turf designs. The first is a longer pile (1-1 1⁄4” bent grass) slit film fiber and the much shorter texturized product above. We recommend the 16/30 and 30/50 for the longer pile slit film products and the 20/40 blend for tennis and bocce courts. Most bent grass putting green systems will be backfilled with approx. 5-6lbs of 16-30 raw sand per square foot and then top dressed with approx. 1lb/s of green 16-30 Envirofill per square to achieve optimal ball and surface performance. Short, texturized systems should be infilled with 100% 30-50 Blend (green and black) at a rate of 2-2.5lbs sqft, depending on the pile height. We recommend the same rate of 20-40 on tennis and/or bocce applications.
Similar Blogs