Sports Field Blog
What is The Motz Group’s Synthetic Turf Installation Process?
For most synthetic turf field owners and their communities, one of the most exciting parts of their project is finally seeing the green rolled out on their field. But a lot of people don’t know what happens between the start of a synthetic turf construction and the roll out of the green. Based on the turf provider and owner preference, the process of how your field is constructed can look a little different. However, a basic knowledge of what each layer looks like can assist you in planning and understanding what is happening on your field every step of the way.
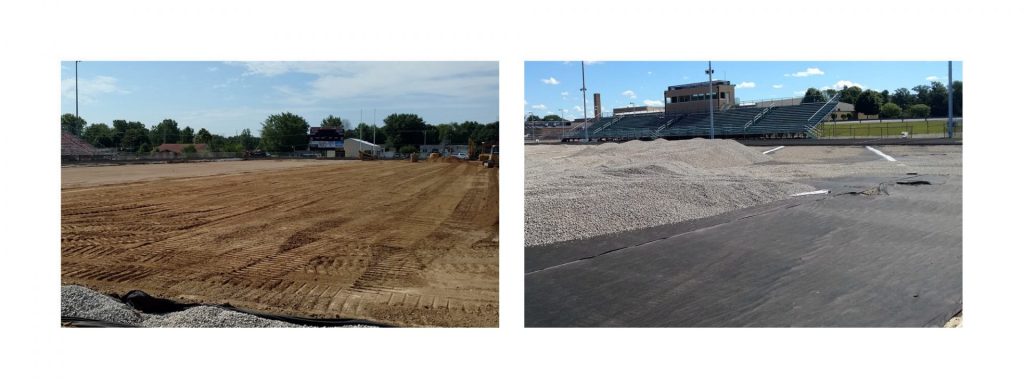
Excavation
If your field is made of natural grass and you are converting it to synthetic turf, your grass field will need to be excavated (or dug up) to make room for your base (we’ll get to that a little later). The existing grass field and a layer of soil are removed, and then the soil is compacted. You might hear this compacted soil referred to as the subgrade of your field. This stage requires a lot of oversight as it sets the stage for a successful system from day one through one, two or even three synthetic turf cycles.
It’s also recommended that an additional layer of protection be included, which can be a geotextile fabric or another type of liner to protect the subgrade from the clean stone base above it.
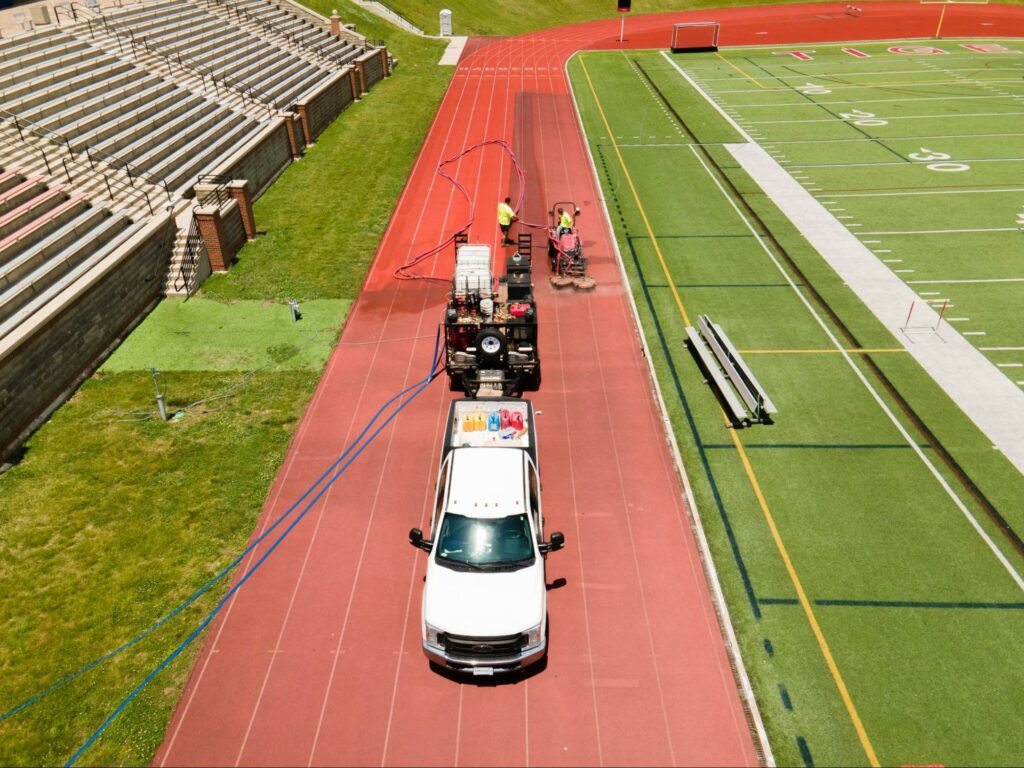
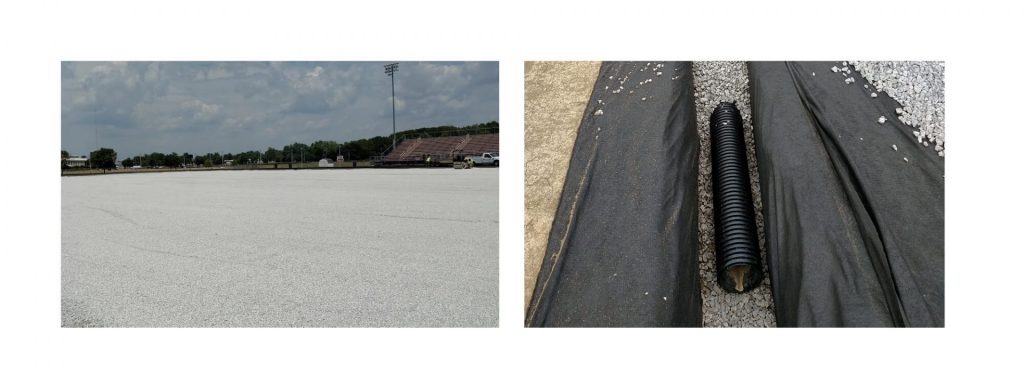
Stone and Drainage Pipes
The next layer involves a few key pieces. The first is a layer of base stone and a layer of finish stone. This piece is integral to your field draining properly. The stone will allow for water to flow freely while providing stability so that the surface will not settle over time.
This will also be the time to install a drainage pipe throughout the field. Different sizes, shapes, and materials of pipe are needed for different projects. We will guide you to the proper system for your facility to avoid standing water on your field. Your selected synthetic turf specialist will identify the best drainage solution for your site’s requirements.
Keep in mind, your field is a construction project and may require certain permits and governmental approvals. Always check with your local agencies to ensure the project is not unexpectedly delayed.
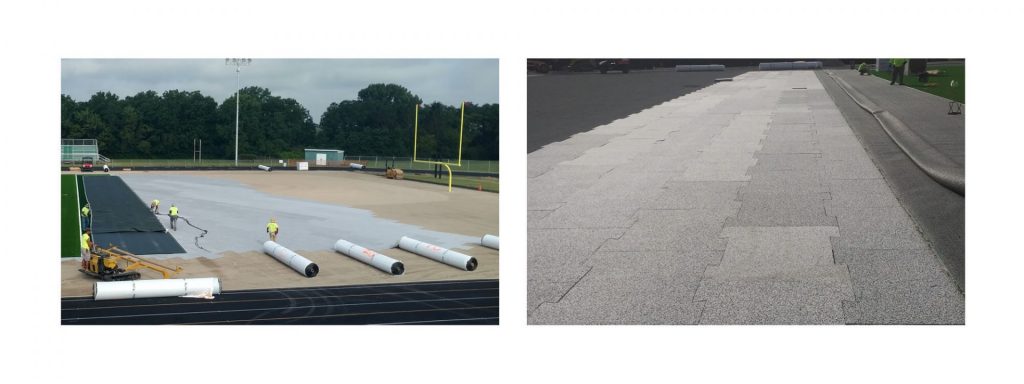
Shock Attenuation Pad (optional)
Many owners have found benefits in the inclusion of a shock absorption pad within their field system. If a pad is selected, it will live between the gravel base and the turf layer. There are varying options of pads with regard to price, warranty, installation process, and playability. Many shock pads can be used beyond one life cycle, and depending on the infill selected, may be required for your system.
Alternative Step: Removal
If you have an existing synthetic turf field, the first three steps won’t be applicable to your process. Your turf provider will do tests and evaluations to ensure that your base, drainage, pad (if selected), etc. are still in top shape and ready for another lifecycle of synthetic turf. The existing synthetic turf is removed, and the following steps will be relevant to your project.
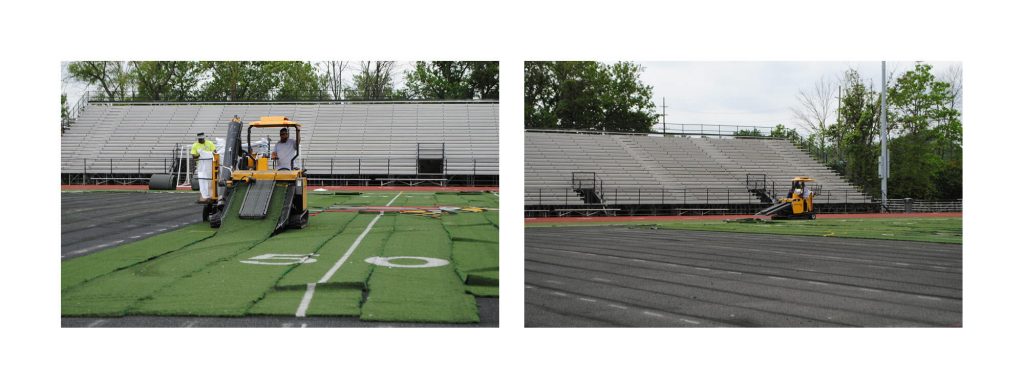
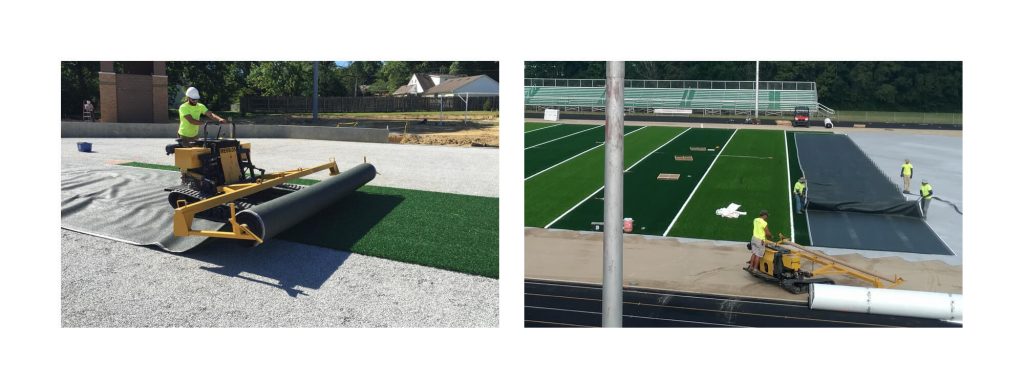
Synthetic Turf
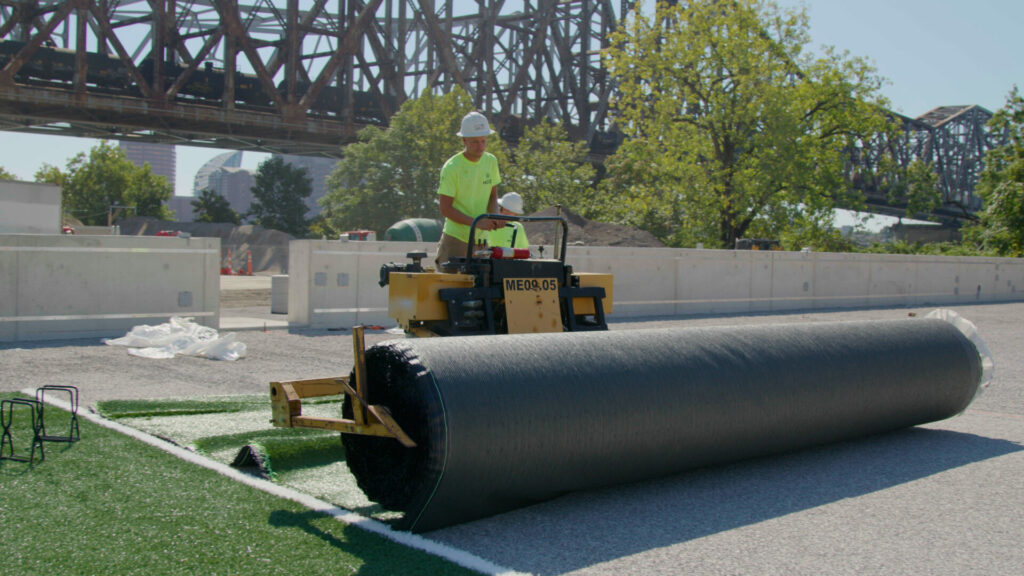
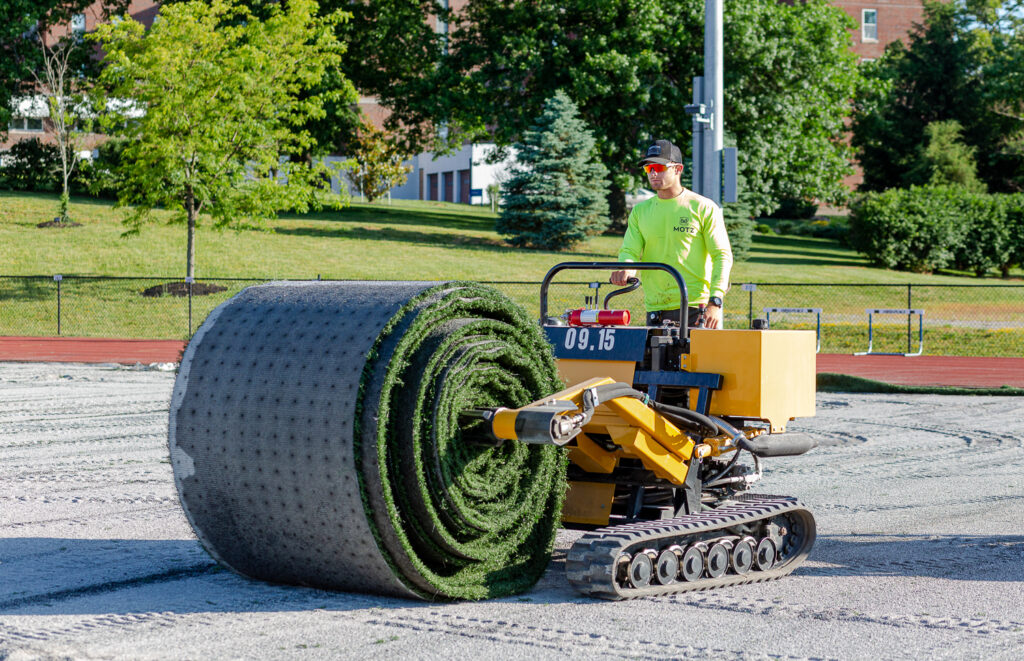
Now it’s time for turf! Dependent upon your turf provider and the system, the turf installation process can look a little different from job to job. The following process is based on what our team has seen work best based on our synthetic turf experience.
Turf is typically delivered to the site in 15-foot wide rolls. The first roll is laid out facing up. The next piece is rolled out facing down on top of the first piece of turf. The two will then be attached together. Once the pieces of turf are secured, the second piece is then pulled facing up by the installation team, and laid flat on top of the stone base or the shock pad system. After the field is secure from goal line to goal line, the sideline and endzone panels are installed.
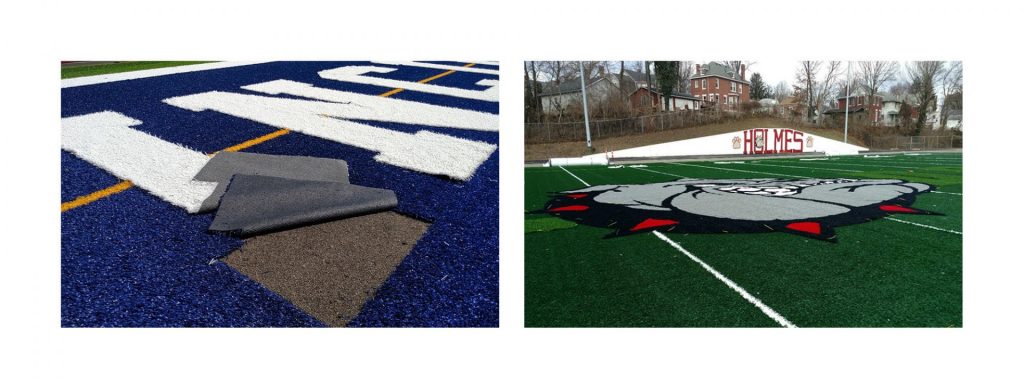
Inlays
At this point, you have a full field! Next up is to install the selected items to personalize your new field to capture your team’s spirit. Those pieces referred to as ‘inlays’ can include numbers, hash marks, school or organization logos, endzone letters, or sideline logos.
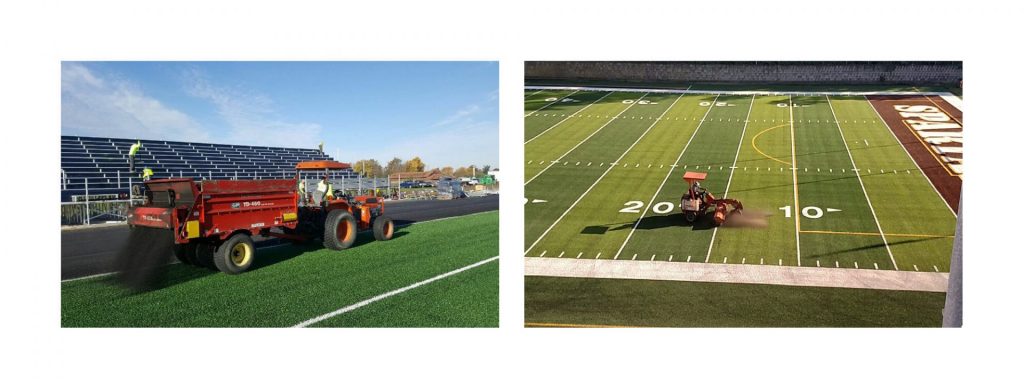
Infill
Once the turf is laid out and secured, it’s time for infill. There are a lot of great options for infill on the market. The most popular options today are crumb rubber and sand. Using a tractor, with the recommended tires for synthetic turf, the infill is dispersed throughout the field then manually brushed into the turf fibers.
Maintenance
After a walk through and maintenance training with your turf provider, it’s time to play! Remember that to keep your field looking as good as it does on day 1, it will need regular grooming – especially during peak activity time. Looking into an annual maintenance program is always a good idea. You can see some examples of finished fields in the Project Showcase section of our website.
For more information on the construction and installation process for a synthetic turf field, or how to bring it to your facility, contact us to discuss with a member of our team.
Similar Blogs